2022/02/26

NVIDIA DeepStreamの推論結果をRedisに送信するサンプルアプリケーションの実行環境を構築する

概要

NVIDIA DeepStream SDKには,推論結果をサーバに送信するためのGst-nvmsgbrokerプラグインが用意されています. このGst-nvmsgbrokerプラグインはRedisのほか,プロトコルアダプタライブラリを使用することで,Kafka,Azure IoTやAMQPなどの各種プロトコルに対応します.

Gst-nvmsgbrokerプラグインを使用したサンプルアプリケーションとプロトコルアダプタライブラリはいくつか用意されていますが,これらのライブラリには各種サーバへの接続方法の記載はあれど,各種サーバの構築方法は紹介されていません. 私はRedisも含めてデータベースの構築や運用の経験がなかったので,サンプルアプリケーションを実行するまでに結構時間がかかってしまいました. そこで本記事では,私が構築したNVIDIA DeepStreamの推論結果をRedisに送信するサンプルアプリケーションの実行環境について紹介します.

本記事で紹介する実行環境は,GitHubで公開しています.See README.md for a quick start in English.

私の開発環境は下記のとおりです.

OS Ubuntu 20.04.3 LTS (amd64)
GPU GeForce GTX 1070 Ti
Driver Version 510.47.03
CUDA Version 11.6
Docker version 20.10.12, build e91ed57
docker-compose version 1.29.2, build 5becea4c
DeepStream nvcr.io/nvidia/deepstream:6.0-devel
Gst-nvmsgbrokerプラグインを使用したサンプルアプリケーション

列挙しておきます.非公式のものも含めて他にもある場合はコメントで教えていただけると幸いです. この記事ではC実装のdeepstream-test4を取り上げますが,C実装のdeepstream-test5やPython実装のdeepstream-test4も今回構築した実行環境で試すことができます.

実行環境の構成

実行環境はdocker-compose.ymlにまとめています.3つのDockerコンテナが起動します.

  • redis
    • RedisのDockerコンテナです
  • redisinsight
    • ウェブブラウザからアクセスして使用する,RedisのGUIツール,RedisInsightのDockerコンテナです.必須ではありませんが,サンプルアプリケーションの動作確認に便利です
  • nvds
    • DeepStreamのDockerコンテナです.C実装のdeepstream-test4のビルド済みバイナリとソースコードも含まれています
実行方法
  1. GitHubからdocker-compose.ymlをダウンロードします.
  2. 1
    2
    $ cd deepstream-test4-c-redis/
  3. Dockerコンテナを起動します.初回はDockerイメージのダウンロードがあり起動に時間を要する場合があります
  4. 1
    2
    3
    4
    5
    6
    $ docker-compose up -d
    Creating network "deepstream-test4-c-redis_frontend" with the default driver
    Creating volume "deepstream-test4-c-redis_redisinsight" with default driver
    Creating redis ... done
    Creating nvds         ... done
    Creating redisinsight ... done
  5. Redisが使用できるかどうか確認します.テストデータの登録と取得を行います
  6. 1
    2
    3
    4
    5
    6
    7
    8
    9
    10
    $ docker exec -it redis /bin/bash
    root@redis:/data# redis-cli
    127.0.0.1:6379> set testKey testValue
    OK
    127.0.0.1:6379> keys *
    1) "testKey"
    127.0.0.1:6379> get testKey
    "testValue"
    127.0.0.1:6379> exit
    root@redis:/data# exit
  7. テストデータの登録結果をRedisInsightで確認します
    • ウェブブラウザで http://localhost:8001 にアクセスします
    • 「EULA AND PRIVACY SETTINGS」が表示されたら,内容にしたがってCONFIRMを押下します
    • RedisInsightのスクリーンショット
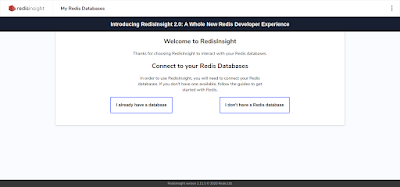
    • Redisに接続します.「I already have a database」を選択します
    • RedisInsightのスクリーンショット
    • 「Connect to a Redis Database」を選択します
    • RedisInsightのスクリーンショット
    • 下図のように入力し,ADD REDIS DATABASEを押下します
    • RedisInsightのスクリーンショット
    • Redisデータベース,localが追加されました.localを選択します
    • RedisInsightのスクリーンショット
    • 左のメニューからBrowserを選択すると,testKeyが登録されていることがわかります.なお下図では他にds-metaが登録されていますが,これは以降の手順でサンプルアプリケーションを実行した後で登録されるものです
    • RedisInsightのスクリーンショット
  8. サンプルアプリケーションを実行します.入力動画はDockerイメージに含まれるサンプル動画を使用します.実行中は物体検出結果を表示するウィンドウが表示され,自動的に終了します
  9. 1
    2
    3
    4
    $ xhost +
    $ docker exec -it nvds /bin/bash
    # cd sources/apps/sample_apps/deepstream-test4/
    # deepstream-test4-app -i ../../../../samples/streams/sample_720p.h264 -p /opt/nvidia/deepstream/deepstream-6.0/lib/libnvds_redis_proto.so --conn-str="redis;6379" -t ds-meta -s 0
  10. 推論結果がRedisに送信されていることをCUIで確認します."ds-meta"のKeyが増えています
  11. 1
    2
    3
    4
    5
    $ docker exec -it redis /bin/bash
    root@redis:/data# redis-cli
    127.0.0.1:6379> keys *
    1) "ds-meta"
    2) "testKey"
  12. 推論結果がRedisに登録されていることをRedisInsightで確認します
    • ウェブブラウザで http://localhost:8001 にアクセスし,Redisデータベースのlocalを選択します
    • 左のメニューからStreamsを選択すると,ds-metaが登録されていることがわかります.metadataに推論結果が含まれています
    • RedisInsightのスクリーンショット
関連プロジェクト

推論結果の送信先としてRedisではなくKafkaを使用する場合の実行環境も構築しました.下記で公開しています.

製品紹介

2022/02/22

Jetson上のDockerコンテナでCSIカメラを使用する

概要

NVIDIA L4T MLのDockerイメージを使用することで,JetsonでCUDAサポートがONのOpenCVの環境を比較的手軽に準備できるようになりました. そこで本投稿では,Jetson上で起動しているDockerコンテナから,Jetsonに接続されたRaspberry Pi Camera Module 2などのCSIカメラを使用する方法について紹介します.

Jetson Jetson Nano
JetPack 4.6
NVIDIA L4T ML l4t-ml:r32.6.1-py3
CSIカメラ Raspberry Pi Camera Module 2
準備
CSIカメラの接続

Jetson Nanoをシャットダウンして電源ケーブルを外した状態で,CSIカメラを確実に接続してください. インターネット上に接続方法の解説記事が数多くありますので参考にしてください.

サンプルコードの入手

サンプルコードをGitHub Gistに置きましたので,git cloneするかブラウザでダウンロードしてください.

1
2
3
4
5
6
7
Cloning into 'l4t-ml'...
remote: Enumerating objects: 14, done.
remote: Counting objects: 100% (14/14), done.
remote: Compressing objects: 100% (10/10), done.
remote: Total 14 (delta 6), reused 10 (delta 4), pack-reused 0
Unpacking objects: 100% (14/14), done.
CSIカメラの動作確認

これ以降の作業は,Jetsonにキーボード,マウスおよびディスプレイを接続して直接GUIログインしていることを前提に説明します.

Dockerコンテナ上でCSIカメラが使用できるか確認する前に,Jetson OS上で使用できるか確認しておくと良いです. 先ほどgit cloneしたディレクトリにあるPythonスクリプトを下記のとおり実行してください.CSIカメラで撮影中の映像がウィンドウに表示されます. 映像表示ウィンドウがアクティブな状態でESCキーを押下すると,ウィンドウが閉じてPythonスクリプトの実行が終了します.

1
2
3
4
5
6
7
8
9
10
11
12
13
14
15
16
17
18
19
20
21
22
23
24
25
26
27
28
29
30
$ cd l4t-ml/
$ python3 opencv_csi-camera.py
GST_ARGUS: Creating output stream
CONSUMER: Waiting until producer is connected...
GST_ARGUS: Available Sensor modes :
GST_ARGUS: 3264 x 2464 FR = 21.000000 fps Duration = 47619048 ; Analog Gain range min 1.000000, max 10.625000; Exposure Range min 13000, max 683709000;
 
GST_ARGUS: 3264 x 1848 FR = 28.000001 fps Duration = 35714284 ; Analog Gain range min 1.000000, max 10.625000; Exposure Range min 13000, max 683709000;
 
GST_ARGUS: 1920 x 1080 FR = 29.999999 fps Duration = 33333334 ; Analog Gain range min 1.000000, max 10.625000; Exposure Range min 13000, max 683709000;
 
GST_ARGUS: 1640 x 1232 FR = 29.999999 fps Duration = 33333334 ; Analog Gain range min 1.000000, max 10.625000; Exposure Range min 13000, max 683709000;
 
GST_ARGUS: 1280 x 720 FR = 59.999999 fps Duration = 16666667 ; Analog Gain range min 1.000000, max 10.625000; Exposure Range min 13000, max 683709000;
 
GST_ARGUS: 1280 x 720 FR = 120.000005 fps Duration = 8333333 ; Analog Gain range min 1.000000, max 10.625000; Exposure Range min 13000, max 683709000;
 
GST_ARGUS: Running with following settings:
   Camera index = 0
   Camera mode  = 2
   Output Stream W = 1920 H = 1080
   seconds to Run    = 0
   Frame Rate = 29.999999
GST_ARGUS: Setup Complete, Starting captures for 0 seconds
GST_ARGUS: Starting repeat capture requests.
CONSUMER: Producer has connected; continuing.
[ WARN:0] global /home/nvidia/host/build_opencv/nv_opencv/modules/videoio/src/cap_gstreamer.cpp (933) open OpenCV | GStreamer warning: Cannot query video position: status=0, value=-1, duration=-1
GST_ARGUS: Cleaning up
CONSUMER: Done Success
GST_ARGUS: Done Success

なお,CSIカメラの動作確認方法はNVIDIAのチュートリアルにも紹介があります.

CSIカメラをDockerコンテナで使用する
方法

方法については,下記ページの「Run the container」に簡単な記載があります. つまり,docker runコマンドのオプションとして-v /tmp/argus_socket:/tmp/argus_socketを付加する必要があります. 一方,例えば/dev/video1としてJetson OSに認識されているUSBカメラを使用したい場合は,--device /dev/video1:/dev/video1:rwmを付加する必要があります.

See /opt/nvidia/deepstream/deepstream-6.0/README inside the container for deepstream-app usage information. Additional argument to add to above docker command for accessing CSI Camera from Docker: -v /tmp/argus_socket:/tmp/argus_socket For USB Camera additional argument --device /dev/video
Dockerコンテナの起動スクリプト例

先ほどgit cloneしたディレクトリにDockerコンテナの起動スクリプト例,run_with_csi-camera.shがあります. お好みのテキストエディタで内容を確認してください.

1
2
$ cd l4t-ml/
$ vi run_with_csi-camera.sh

run_with_csi-camera.shを実行するとDockerコンテナが起動します. l4t-ml:r32.6.1-py3のDokcerイメージがローカルに存在しない場合は,初回にPullされます.

1
2
3
4
5
$ ./run_with_csi-camera.sh
access control disabled, clients can connect from any host
[sudo] password for username:
allow 10 sec for JupyterLab to start @ http://192.168.110.36:8888 (password nvidia)
JupterLab logging location:  /var/log/jupyter.log  (inside the container)
CSIカメラの動作確認

git cloneしたディレクトリはDockerコンテナ上の/dataにマウントされています. ここにあるOpenCVの簡単なサンプルコードを実行して,DockerコンテナでCSIカメラが使用できることを確認します.

opencv_csi-camera.pyはCSIカメラで撮影中の映像がウィンドウに表示されます. 映像表示ウィンドウがアクティブな状態でESCキーを押下すると,ウィンドウが閉じてPythonスクリプトの実行が終了します.

1
2
root@jetson-nano:/# cd /data/
root@jetson-nano:/data# python3 opencv_csi-camera.py

opencv_face-detection_csi-camera.pyはCSIカメラの映像から顔を検出し,顔が検出された場合は映像に顔の領域を示す白枠を描画してウィンドウに表示します. 映像表示ウィンドウがアクティブな状態でESCキーを押下すると,ウィンドウが閉じてPythonスクリプトの実行が終了します.

1
2
3
4
5
6
7
8
9
10
11
12
13
14
15
16
17
18
19
20
21
22
23
24
25
26
27
28
29
30
root@jetson-nano:/# cd /data/
root@jetson-nano:/data# python3 opencv_face-detection_csi-camera.py
GST_ARGUS: Creating output stream
CONSUMER: Waiting until producer is connected...
GST_ARGUS: Available Sensor modes :
GST_ARGUS: 3264 x 2464 FR = 21.000000 fps Duration = 47619048 ; Analog Gain range min 1.000000, max 10.625000; Exposure Range min 13000, max 683709000;
 
GST_ARGUS: 3264 x 1848 FR = 28.000001 fps Duration = 35714284 ; Analog Gain range min 1.000000, max 10.625000; Exposure Range min 13000, max 683709000;
 
GST_ARGUS: 1920 x 1080 FR = 29.999999 fps Duration = 33333334 ; Analog Gain range min 1.000000, max 10.625000; Exposure Range min 13000, max 683709000;
 
GST_ARGUS: 1640 x 1232 FR = 29.999999 fps Duration = 33333334 ; Analog Gain range min 1.000000, max 10.625000; Exposure Range min 13000, max 683709000;
 
GST_ARGUS: 1280 x 720 FR = 59.999999 fps Duration = 16666667 ; Analog Gain range min 1.000000, max 10.625000; Exposure Range min 13000, max 683709000;
 
GST_ARGUS: 1280 x 720 FR = 120.000005 fps Duration = 8333333 ; Analog Gain range min 1.000000, max 10.625000; Exposure Range min 13000, max 683709000;
 
GST_ARGUS: Running with following settings:
   Camera index = 0
   Camera mode  = 2
   Output Stream W = 1920 H = 1080
   seconds to Run    = 0
   Frame Rate = 29.999999
GST_ARGUS: Setup Complete, Starting captures for 0 seconds
GST_ARGUS: Starting repeat capture requests.
CONSUMER: Producer has connected; continuing.
[ WARN:0] global /opt/opencv/modules/videoio/src/cap_gstreamer.cpp (935) open OpenCV | GStreamer warning: Cannot query video position: status=0, value=-1, duration=-1
GST_ARGUS: Cleaning up
CONSUMER: Done Success
GST_ARGUS: Done Success

製品紹介

2022/02/20

NVIDIA L4T MLのDockerイメージで,Jetson上にCUDAをサポートするOpenCVの環境を準備する

概要

JetPack 4.6にはOpenCV 4.1.1が含まれていますが,CUDAサポートがOFFになっています. ここでは比較的手軽にCUDAサポートがONのOpenCVの環境を準備する方法として,NVIDIA L4T MLのDockerイメージを使用する方法をメモしておきます.

Jetson Jetson Nano
JetPack 4.6
NVIDIA L4T ML l4t-ml:r32.6.1-py3
NIVIDIA NGCとNVIDIA L4T ML

NVIDIA NGCでは,さまざまな用途のための,ディープラーニング,機械学習およびHPC向けのDockerイメージが配布されています. Jetson向けのDockerイメージは下記のリンクから一覧表示できます.

NVIDA NGCで配布されているDockerイメージの1つにNVIDIA L4T MLがあります.これはディープラーニング,機械学習やデータサイエンスの各種フレームワークをPython 3.6上で使用するための環境です. 下記ページの「Package Versions」を確認するとl4t-ml:r32.6.1-py3のリストにはOpenCV 4.5.0 (with CUDA)と記載されており,CUDAサポートがONになっていることがわかります.

Dockerコンテナを起動する
ワーキングディレクトリと起動スクリプトの準備

お好みの場所にワーキングディレクトリを作成し,その中にDockerコンテナの起動スクリプト,run.shを作成します. ここでは既存ディレクトリの/dataの配下にl4t-mlというディレクトリを作成しています.

1
2
3
$ cd /data
$ mkdir l4t-ml
$ cd l4t-ml/

お好みのテキストエディタでrun.shを作成し,下記リンクのrun.shの内容をコピー・アンド・ペーストしてください. なお,使用するDockerイメージのタグはJetPack 4.6に対応するr32.6.1-py3になっています.違うタグを指定したい場合は,NVIDIA L4T MLのページを参照して任意のタグに置き換えてください.

1
$ vi run.sh
Dockerコンテナの起動

少なくともこれ以降の作業は,Jetsonにキーボード,マウスおよびディスプレイを接続して直接GUIログインしていることを前提に説明します. run.shに実行権限を付与し,実行してください.初回はDockerイメージのPullがあり,Dockerコンテナの起動に時間がかかります.

1
2
3
4
5
6
7
8
9
10
11
12
13
14
15
16
17
18
19
20
21
22
23
24
25
26
27
28
29
30
31
32
33
34
35
36
37
38
39
40
41
42
43
44
45
$ chmod a+x ./run.sh
$ ./run.sh
access control disabled, clients can connect from any host
[sudo] password for username:
Unable to find image 'nvcr.io/nvidia/l4t-ml:r32.6.1-py3' locally
r32.6.1-py3: Pulling from nvidia/l4t-ml
e47a8a86d66c: Pulling fs layer
bdce3430dad6: Pulling fs layer
c26a6b81c746: Pulling fs layer
a70635e646de: Waiting
24cbe60e3161: Waiting
c7f64cc97a39: Waiting
8777adb92eda: Waiting
542a24b3572f: Waiting
3d5ade2b8849: Waiting
3e865584f789: Waiting
4811af6cacf1: Waiting
db645757aac7: Pull complete
0105dc23dc93: Pull complete
c8aff3baf097: Pull complete
5f50b3e38480: Pull complete
b5418d85b074: Pull complete
d09ffaf0f11a: Pull complete
f1cf5625978f: Pull complete
514fd4c3f8c5: Pull complete
0988d0ccf8a6: Pull complete
ffce97733d6c: Pull complete
80d5eedfe895: Pull complete
d19792019860: Pull complete
3ee7b31a8890: Pull complete
8aca18eb38a5: Pull complete
153000266b1a: Pull complete
23bf7741f5d8: Pull complete
d03fa2111a1c: Pull complete
095c23b57578: Pull complete
2de9347ccaf2: Pull complete
0f26c4b0a765: Pull complete
ee3bc588c8ee: Pull complete
aa25eb953d98: Pull complete
97fd80a69cc6: Pull complete
Digest: sha256:1f4ef02343223cab6bbe5bf85d5575364b7ee0ee23d72c2e3b89416ca3806f7e
Status: Downloaded newer image for nvcr.io/nvidia/l4t-ml:r32.6.1-py3
allow 10 sec for JupyterLab to start @ http://192.168.110.36:8888 (password nvidia)
JupterLab logging location:  /var/log/jupyter.log  (inside the container)
root@jetson-nano:/#

Dockerコンテナが起動し,Dockerコンテナの端末が表示されました.

dockerコマンドを実行するとエラーになる場合は,下記が解決の参考になるかもしれません.

Python 3でOpenCVライブラリの情報を確認する

下記の投稿で紹介した方法で,Dockerコンテナ上のOpenCVライブラリの情報を確認してみました. CUDAサポートがONになっています.

1
2
3
4
5
6
7
8
9
10
11
12
13
14
15
16
17
18
19
20
21
22
23
24
25
26
27
28
29
30
31
32
33
34
35
36
37
38
39
40
41
42
43
44
45
46
47
48
49
50
51
52
53
54
55
56
57
58
59
60
61
62
63
64
65
66
67
68
69
70
71
72
73
74
75
76
77
78
79
80
81
82
83
84
85
86
87
88
89
90
91
92
93
94
95
96
97
98
99
100
101
102
103
104
105
106
107
108
109
110
111
112
113
114
115
116
117
118
119
120
root@jetson-nano:/# python3
Python 3.6.9 (default, Jan 26 2021, 15:33:00)
[GCC 8.4.0] on linux
Type "help", "copyright", "credits" or "license" for more information.
>>> import cv2
>>> print(cv2.__version__)
4.5.0
>>> print(cv2.getBuildInformation())
 
General configuration for OpenCV 4.5.0 =====================================
  Version control:               4.5.0
 
  Extra modules:
    Location (extra):            /opt/opencv_contrib/modules
    Version control (extra):     4.5.0
 
  Platform:
    Timestamp:                   2021-07-19T21:05:54Z
    Host:                        Linux 4.9.201-tegra aarch64
    CMake:                       3.10.2
    CMake generator:             Unix Makefiles
    CMake build tool:            /usr/bin/make
    Configuration:               RELEASE
 
  CPU/HW features:
    Baseline:                    NEON FP16
      required:                  NEON
      disabled:                  VFPV3
 
  C/C++:
    Built as dynamic libs?:      YES
    C++ standard:                11
    C++ Compiler:                /usr/bin/c++  (ver 7.5.0)
    C++ flags (Release):         -fsigned-char -W -Wall -Werror=return-type -Werror=non-virtual-dtor -Werror=address -Werror=sequence-point -Wformat -Werror=format-security -Wmissing-declarations -Wundef -Winit-self -Wpointer-arith -Wshadow -Wsign-promo -Wuninitialized -Winit-self -Wsuggest-override -Wno-delete-non-virtual-dtor -Wno-comment -Wimplicit-fallthrough=3 -Wno-strict-overflow -fdiagnostics-show-option -pthread -fomit-frame-pointer -ffunction-sections -fdata-sections    -fvisibility=hidden -fvisibility-inlines-hidden -O3 -DNDEBUG  -DNDEBUG
    C++ flags (Debug):           -fsigned-char -W -Wall -Werror=return-type -Werror=non-virtual-dtor -Werror=address -Werror=sequence-point -Wformat -Werror=format-security -Wmissing-declarations -Wundef -Winit-self -Wpointer-arith -Wshadow -Wsign-promo -Wuninitialized -Winit-self -Wsuggest-override -Wno-delete-non-virtual-dtor -Wno-comment -Wimplicit-fallthrough=3 -Wno-strict-overflow -fdiagnostics-show-option -pthread -fomit-frame-pointer -ffunction-sections -fdata-sections    -fvisibility=hidden -fvisibility-inlines-hidden -g  -O0 -DDEBUG -D_DEBUG
    C Compiler:                  /usr/bin/cc
    C flags (Release):           -fsigned-char -W -Wall -Werror=return-type -Werror=address -Werror=sequence-point -Wformat -Werror=format-security -Wmissing-declarations -Wmissing-prototypes -Wstrict-prototypes -Wundef -Winit-self -Wpointer-arith -Wshadow -Wuninitialized -Winit-self -Wno-comment -Wimplicit-fallthrough=3 -Wno-strict-overflow -fdiagnostics-show-option -pthread -fomit-frame-pointer -ffunction-sections -fdata-sections    -fvisibility=hidden -O3 -DNDEBUG  -DNDEBUG
    C flags (Debug):             -fsigned-char -W -Wall -Werror=return-type -Werror=address -Werror=sequence-point -Wformat -Werror=format-security -Wmissing-declarations -Wmissing-prototypes -Wstrict-prototypes -Wundef -Winit-self -Wpointer-arith -Wshadow -Wuninitialized -Winit-self -Wno-comment -Wimplicit-fallthrough=3 -Wno-strict-overflow -fdiagnostics-show-option -pthread -fomit-frame-pointer -ffunction-sections -fdata-sections    -fvisibility=hidden -g  -O0 -DDEBUG -D_DEBUG
    Linker flags (Release):      -Wl,--gc-sections -Wl,--as-needed 
    Linker flags (Debug):        -Wl,--gc-sections -Wl,--as-needed 
    ccache:                      NO
    Precompiled headers:         NO
    Extra dependencies:          m pthread cudart_static dl rt nppc nppial nppicc nppicom nppidei nppif nppig nppim nppist nppisu nppitc npps cublas cudnn cufft -L/usr/local/cuda/lib64 -L/usr/lib/aarch64-linux-gnu
    3rdparty dependencies:
 
  OpenCV modules:
    To be built:                 alphamat aruco bgsegm bioinspired calib3d ccalib core cudaarithm cudabgsegm cudacodec cudafeatures2d cudafilters cudaimgproc cudalegacy cudaobjdetect cudaoptflow cudastereo cudawarping cudev datasets dnn dnn_objdetect dnn_superres dpm face features2d flann freetype fuzzy gapi hfs highgui img_hash imgcodecs imgproc intensity_transform line_descriptor mcc ml objdetect optflow phase_unwrapping photo plot python3 quality rapid reg rgbd saliency shape stereo stitching structured_light superres surface_matching text tracking video videoio videostab xfeatures2d ximgproc xobjdetect xphoto
    Disabled:                    world
    Disabled by dependency:      -
    Unavailable:                 cnn_3dobj cvv hdf java js julia matlab ovis python2 sfm ts viz
    Applications:                apps
    Documentation:               NO
    Non-free algorithms:         YES
 
  GUI:
    GTK+:                        YES (ver 3.22.30)
      GThread :                  YES (ver 2.56.4)
      GtkGlExt:                  NO
    OpenGL support:              NO
    VTK support:                 NO
 
  Media I/O:
    ZLib:                        /usr/lib/aarch64-linux-gnu/libz.so (ver 1.2.11)
    JPEG:                        /usr/lib/aarch64-linux-gnu/libjpeg.so (ver 80)
    WEBP:                        build (ver encoder: 0x020f)
    PNG:                         /usr/lib/aarch64-linux-gnu/libpng.so (ver 1.6.34)
    TIFF:                        build (ver 42 - 4.0.10)
    JPEG 2000:                   build (ver 2.3.1)
    OpenEXR:                     build (ver 2.3.0)
    HDR:                         YES
    SUNRASTER:                   YES
    PXM:                         YES
    PFM:                         YES
 
  Video I/O:
    DC1394:                      YES (2.2.5)
    FFMPEG:                      YES
      avcodec:                   YES (57.107.100)
      avformat:                  YES (57.83.100)
      avutil:                    YES (55.78.100)
      swscale:                   YES (4.8.100)
      avresample:                YES (3.7.0)
    GStreamer:                   YES (1.14.5)
    v4l/v4l2:                    YES (linux/videodev2.h)
 
  Parallel framework:            TBB (ver 2017.0 interface 9107)
 
  Trace:                         YES (with Intel ITT)
 
  Other third-party libraries:
    Lapack:                      YES (/usr/lib/aarch64-linux-gnu/liblapack.so /usr/lib/aarch64-linux-gnu/libcblas.so /usr/lib/aarch64-linux-gnu/libatlas.so)
    Eigen:                       YES (ver 3.3.4)
    Custom HAL:                  YES (carotene (ver 0.0.1))
    Protobuf:                    build (3.5.1)
 
  NVIDIA CUDA:                   YES (ver 10.2, CUFFT CUBLAS FAST_MATH)
    NVIDIA GPU arch:             53 62 72
    NVIDIA PTX archs:
 
  cuDNN:                         YES (ver 8.0.0)
 
  Python 3:
    Interpreter:                 /usr/bin/python3 (ver 3.6.9)
    Libraries:                   /usr/lib/aarch64-linux-gnu/libpython3.6m.so (ver 3.6.9)
    numpy:                       /usr/lib/python3/dist-packages/numpy/core/include (ver 1.13.3)
    install path:                lib/python3.6/dist-packages/cv2/python-3.6
 
  Python (for build):            /usr/bin/python2.7
 
  Java:                         
    ant:                         NO
    JNI:                         NO
    Java wrappers:               NO
    Java tests:                  NO
 
  Install to:                    /usr/local
-----------------------------------------------------------------
 
 
>>> exit()

製品紹介

JetsonにインストールされているOpenCVの情報を確認する

概要

JetPackは,UbuntuベースのJetson向けOSとJetson SDKコンポーネントのパッケージです.このJetPackにはOpenCVも含まれています. 本記事では,このOpenCVの情報の確認方法を備忘録としてメモします.

Jetson Jetson Nano
JetPack 4.6
JetPackにインストールされているOpenCVのバージョン
JetPack 4.6

JetPackのリリースページにインストールされているOpenCVのバージョンが記載されています. 「KEY FEATURES IN JETPACK」の「Computer Vision」の項目を参照してください.

JetPack 4.6にはOpenCV 4.1.1が含まれていることがわかります. ただし,このOpenCVはCUDAサポートがOFFになっています.OpenCVのサンプルコードを試しに実行する程度であれば,まずはこのOpenCVで良いケースが多いと思います.

なお,CUDAサポートがONのOpenCVは主に下記2通りの方法で入手できます.NVIDIA L4T MLを使用する方法が比較的手軽だと思います.

JetPack 4.6以外

過去のバージョンなど,JetPack 4.6以外のリリースページには下記のリンクからアクセスすることができます.

Jetson statsでOpenCVライブラリの情報を確認する
Jetson statsをインストールする

Jetson statsは,Jetsonのモニタリングや制御ができるユーティリティです.後述のようにPython 3でもOpenCVライブラリの情報を確認することができますが,Jetson statsではコマンド1つでより簡単に確認できます.

下記のコマンドを実行することでインストールできます.インストール後に再起動してください.

1
2
3
$ sudo apt install -y python3-pip
$ sudo -H pip3 install -U jetson-stats
$ sudo reboot
Jetson statsでOpenCVライブラリの情報を確認する

jetson_releaseコマンドを実行します.「OpenCV: 4.1.1 compiled CUDA: NO」という情報から,CUDAサポートがOFFのOpenCV 4.1.1がインストールされていることが確認できます.

1
2
3
4
5
6
7
8
9
10
11
12
13
14
15
16
17
18
19
20
21
22
23
24
$ jetson_release -v
 - NVIDIA Jetson Nano (Developer Kit Version)
   * Jetpack 4.6 [L4T 32.6.1]
   * NV Power Mode: MAXN - Type: 0
   * jetson_stats.service: active
 - Board info:
   * Type: Nano (Developer Kit Version)
   * SOC Family: tegra210 - ID:33
   * Module: P3448-0000 - Board: P3449-0000
   * Code Name: porg
   * Boardids: 3448
   * CUDA GPU architecture (ARCH_BIN): 5.3
   * Serial Number: 0421319028141
 - Libraries:
   * CUDA: 10.2.300
   * cuDNN: 8.2.1.32
   * TensorRT: 8.0.1.6
   * Visionworks: 1.6.0.501
   * OpenCV: 4.1.1 compiled CUDA: NO
   * VPI: ii libnvvpi1 1.1.15 arm64 NVIDIA Vision Programming Interface library
   * Vulkan: 1.2.70
 - jetson-stats:
   * Version 3.1.2
   * Works on Python 3.6.9
Python 3でOpenCVライブラリの情報を確認する
バージョンを確認する

Python 3では,OpenCVがインストールされていることと,インストールされているOpenCVのバージョンを下記のように確認できます.

1
2
3
4
5
6
7
8
$ python3
Python 3.6.9 (default, Dec  8 2021, 21:08:43)
[GCC 8.4.0] on linux
Type "help", "copyright", "credits" or "license" for more information.
>>> import cv2
>>> print(cv2.__version__)
4.1.1
>>> exit()
ビルド情報を確認する

インストールされているOpenCVのビルド情報も確認することができます.

1
2
3
4
5
6
7
8
9
10
11
12
13
14
15
16
17
18
19
20
21
22
23
24
25
26
27
28
29
30
31
32
33
34
35
36
37
38
39
40
41
42
43
44
45
46
47
48
49
50
51
52
53
54
55
56
57
58
59
60
61
62
63
64
65
66
67
68
69
70
71
72
73
74
75
76
77
78
79
80
81
82
83
84
85
86
87
88
89
90
91
92
93
94
95
96
97
98
99
100
101
102
103
104
105
106
107
108
109
$ python3
Python 3.6.9 (default, Dec  8 2021, 21:08:43)
[GCC 8.4.0] on linux
Type "help", "copyright", "credits" or "license" for more information.
>>> import cv2
>>> print(cv2.getBuildInformation())
 
General configuration for OpenCV 4.1.1 =====================================
  Version control:               4.1.1-2-gd5a58aa75
 
  Platform:
    Timestamp:                   2019-12-13T17:25:11Z
    Host:                        Linux 4.9.140-tegra aarch64
    CMake:                       3.10.2
    CMake generator:             Unix Makefiles
    CMake build tool:            /usr/bin/make
    Configuration:               Release
 
  CPU/HW features:
    Baseline:                    NEON FP16
      required:                  NEON
      disabled:                  VFPV3
 
  C/C++:
    Built as dynamic libs?:      YES
    C++ Compiler:                /usr/bin/c++  (ver 7.4.0)
    C++ flags (Release):         -fsigned-char -W -Wall -Werror=return-type -Werror=non-virtual-dtor -Werror=address -Werror=sequence-point -Wformat -Werror=format-security -Wmissing-declarations -Wundef -Winit-self -Wpointer-arith -Wshadow -Wsign-promo -Wuninitialized -Winit-self -Wsuggest-override -Wno-delete-non-virtual-dtor -Wno-comment -Wimplicit-fallthrough=3 -Wno-strict-overflow -fdiagnostics-show-option -pthread -fomit-frame-pointer -ffunction-sections -fdata-sections    -fvisibility=hidden -fvisibility-inlines-hidden -O3 -DNDEBUG  -DNDEBUG
    C++ flags (Debug):           -fsigned-char -W -Wall -Werror=return-type -Werror=non-virtual-dtor -Werror=address -Werror=sequence-point -Wformat -Werror=format-security -Wmissing-declarations -Wundef -Winit-self -Wpointer-arith -Wshadow -Wsign-promo -Wuninitialized -Winit-self -Wsuggest-override -Wno-delete-non-virtual-dtor -Wno-comment -Wimplicit-fallthrough=3 -Wno-strict-overflow -fdiagnostics-show-option -pthread -fomit-frame-pointer -ffunction-sections -fdata-sections    -fvisibility=hidden -fvisibility-inlines-hidden -g  -O0 -DDEBUG -D_DEBUG
    C Compiler:                  /usr/bin/cc
    C flags (Release):           -fsigned-char -W -Wall -Werror=return-type -Werror=non-virtual-dtor -Werror=address -Werror=sequence-point -Wformat -Werror=format-security -Wmissing-declarations -Wmissing-prototypes -Wstrict-prototypes -Wundef -Winit-self -Wpointer-arith -Wshadow -Wuninitialized -Winit-self -Wno-comment -Wimplicit-fallthrough=3 -Wno-strict-overflow -fdiagnostics-show-option -pthread -fomit-frame-pointer -ffunction-sections -fdata-sections    -fvisibility=hidden -O3 -DNDEBUG  -DNDEBUG
    C flags (Debug):             -fsigned-char -W -Wall -Werror=return-type -Werror=non-virtual-dtor -Werror=address -Werror=sequence-point -Wformat -Werror=format-security -Wmissing-declarations -Wmissing-prototypes -Wstrict-prototypes -Wundef -Winit-self -Wpointer-arith -Wshadow -Wuninitialized -Winit-self -Wno-comment -Wimplicit-fallthrough=3 -Wno-strict-overflow -fdiagnostics-show-option -pthread -fomit-frame-pointer -ffunction-sections -fdata-sections    -fvisibility=hidden -g  -O0 -DDEBUG -D_DEBUG
    Linker flags (Release):      -Wl,--gc-sections 
    Linker flags (Debug):        -Wl,--gc-sections 
    ccache:                      NO
    Precompiled headers:         NO
    Extra dependencies:          dl m pthread rt
    3rdparty dependencies:
 
  OpenCV modules:
    To be built:                 calib3d core dnn features2d flann gapi highgui imgcodecs imgproc ml objdetect photo python2 python3 stitching ts video videoio
    Disabled:                    world
    Disabled by dependency:      -
    Unavailable:                 java js
    Applications:                tests perf_tests examples apps
    Documentation:               NO
    Non-free algorithms:         NO
 
  GUI:
    GTK+:                        YES (ver 2.24.32)
      GThread :                  YES (ver 2.56.4)
      GtkGlExt:                  NO
 
  Media I/O:
    ZLib:                        /usr/lib/aarch64-linux-gnu/libz.so (ver 1.2.11)
    JPEG:                        /usr/lib/aarch64-linux-gnu/libjpeg.so (ver 80)
    WEBP:                        build (ver encoder: 0x020e)
    PNG:                         /usr/lib/aarch64-linux-gnu/libpng.so (ver 1.6.34)
    TIFF:                        /usr/lib/aarch64-linux-gnu/libtiff.so (ver 42 / 4.0.9)
    JPEG 2000:                   build (ver 1.900.1)
    HDR:                         YES
    SUNRASTER:                   YES
    PXM:                         YES
    PFM:                         YES
 
  Video I/O:
    FFMPEG:                      YES
      avcodec:                   YES (57.107.100)
      avformat:                  YES (57.83.100)
      avutil:                    YES (55.78.100)
      swscale:                   YES (4.8.100)
      avresample:                NO
    GStreamer:                   YES (1.14.5)
    v4l/v4l2:                    YES (linux/videodev2.h)
 
  Parallel framework:            TBB (ver 2017.0 interface 9107)
 
  Trace:                         YES (with Intel ITT)
 
  Other third-party libraries:
    Lapack:                      NO
    Eigen:                       YES (ver 3.3.4)
    Custom HAL:                  YES (carotene (ver 0.0.1))
    Protobuf:                    build (3.5.1)
 
  Python 2:
    Interpreter:                 /usr/bin/python2.7 (ver 2.7.15)
    Libraries:                   /usr/lib/aarch64-linux-gnu/libpython2.7.so (ver 2.7.15+)
    numpy:                       /usr/lib/python2.7/dist-packages/numpy/core/include (ver 1.13.3)
    install path:                lib/python2.7/dist-packages/cv2/python-2.7
 
  Python 3:
    Interpreter:                 /usr/bin/python3 (ver 3.6.9)
    Libraries:                   /usr/lib/aarch64-linux-gnu/libpython3.6m.so (ver 3.6.9)
    numpy:                       /usr/lib/python3/dist-packages/numpy/core/include (ver 1.13.3)
    install path:                lib/python3.6/dist-packages/cv2/python-3.6
 
  Python (for build):            /usr/bin/python2.7
 
  Java:                         
    ant:                         NO
    JNI:                         NO
    Java wrappers:               NO
    Java tests:                  NO
 
  Install to:                    /usr
-----------------------------------------------------------------
 
 
>>> exit()

製品紹介

2022/02/02

ドットマトリクス液晶表示モジュール SII L167100J

概要

手元にセイコーインスツル株式会社 (Seiko Instruments, SII)のドットマトリクス液晶表示モジュール L167100Jがあります.いわゆるキャラクタ液晶表示モジュールの1種です. しかし,既にこれらのドットマトリクス液晶表示モジュールは終息しており,公式Webページからはデータシートをダウンロードできませんでした. 備忘録として,他のサイトから入手できた情報とデータシートについて記録しておきます.

データシート

下記の海外サイトで閲覧できました.ページタイトルにあるL1634は16文字x4行仕様で,私の手元にあるL1671は16文字x1行仕様です. またL1671などの5文字に続く3文字はLEDバックライトの有無を示し,00Jは反射型でLEDバックライトなし,B1Jは半透過型でイエローグリーンのLEDバックライト付です. これらは同じデータシートにまとめられています.

表示文字数 (文字数 x 行) 型名
16 x 1 L1671
16 x 2 L1672
16 x 2 L1682
16 x 2 L1692
16 x 4 L1634
20 x 2 L2032
20 x 4 L2034
24 x 2 L2462
40 x 2 L4052
40 x 4 L4044

SII ドットマトリクス液晶表示モジュールの終息経緯

SII ドットマトリクス液晶表示モジュールの終息経緯については,株式会社アスカ電子の資料が引っかかりました. SIIとしては2006年8月に最終製造だったようです.その後の事業移管などの流れについても記載されていますので,興味がある方はご覧ください. 2ページ目と3ページ目に仕様の一覧表もあります.

製品紹介